Tutorial: Editing a newborn
I get asked if I have any tips for editing newborns quite a bit, so here is what I do to make those adorable little ones into a beautiful portrait :)
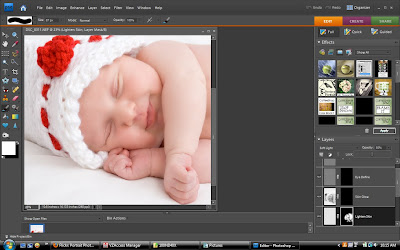
First I will have to say that for newborn pictures it is all about the lighting, even lighting will give you a more even skin tone and you will have less editing to do. Also shooting in RAW is a must! At this session this adorable little girl gave a smile, just 1 smile.....and my strobe, camera left didn't fire so the lighting is not at all what I wanted.
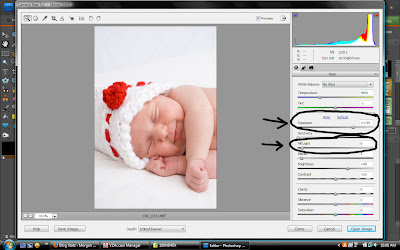
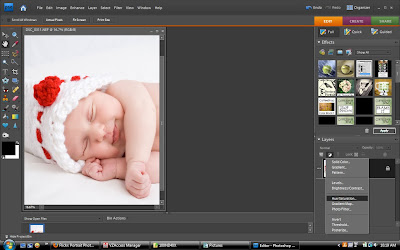
This image is straight out of my camera in RAW format.

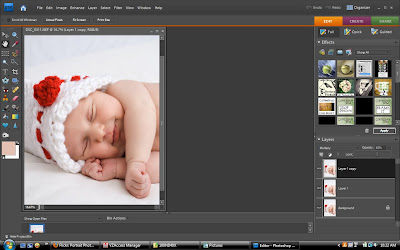
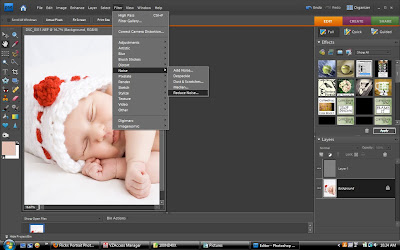
When I open up the RAW image in PSE I bring up my exposure and fill light until it is brighter and more evenly lit.
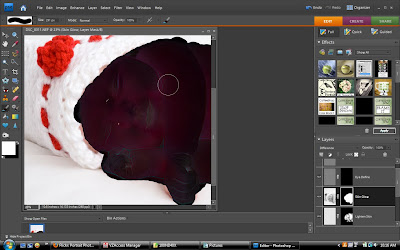
Of course next I run CoffeeShop baby powder room :) It is fantastic!
I don't use the red skin layer, so I start with the soft skin layer (I changed the blend mode so you can see where I brushed) I avoid the detail areas.
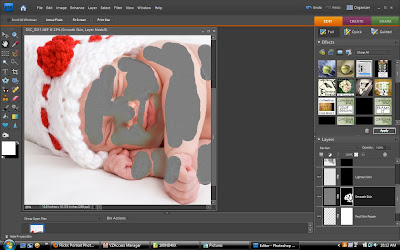
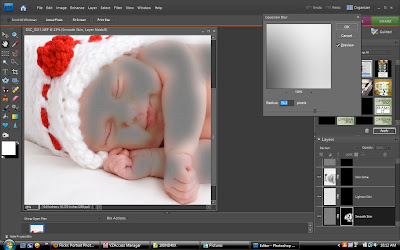
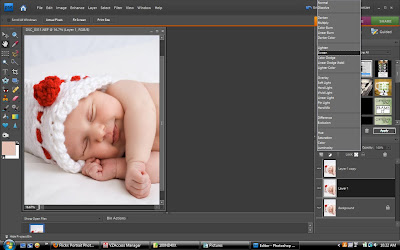
Then I use the gaussian blur at a pretty high amount so that it is nice and even.
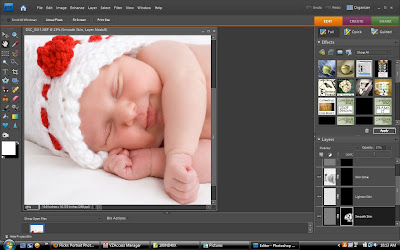
The result from the soft skin layer after adjusting the opacity.
Next the lighten skin layer, you can see the areas I brushed over, avoiding the detail spots again.

Gaussian blur just as with the soft skin layer, and bring down the opacity.

Result after adjusting the opacity.
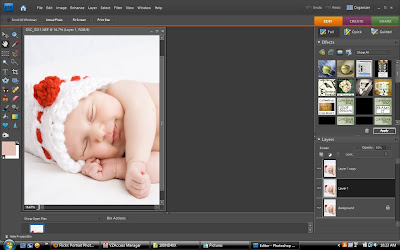
Next is the skin glow layer, I cover every inch of skin (changed blend mode to show where I brushed). Gaussian blur just like the previous 2 layers.
Result from skin glow after adjusting opacity

Then we have the eye define layer, I brush over the eyes and little detail areas I want to showcase.
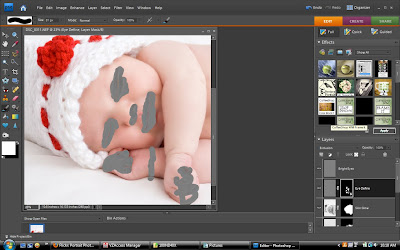
Gaussian blur less this time, just enough to spread out the brush line to a more natural look.
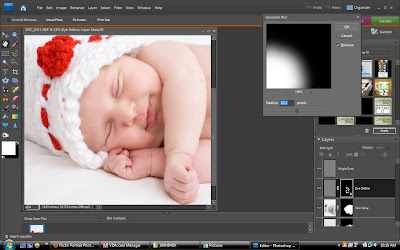
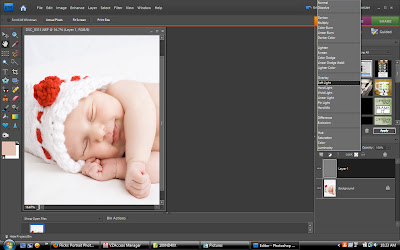
Flatten the image
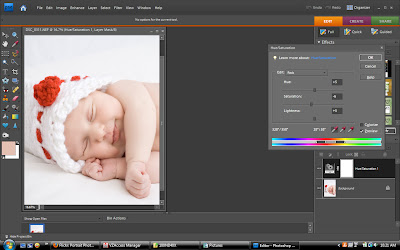
Now to remove the red tint from the skin. Add an adjustment layer and select hue/saturation.
Once you come to the adjustment layer menu, use your drop down menu to select reds. Use your dropper and select a red area of the newborns skin.
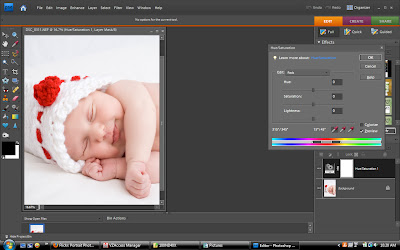
You want to increase the hue, which will turn the skin more yellow. Decrease the saturation thus decreasing the amount of yellow. Lighten a little bit too so that it makes the skin more creamy. These numbers are not the same for other photos, adjust them as much as you need to get the desired look.
Next duplicate the layer 2 times.
With the top layer set the blending mode to multiply, this will add more contrast to your image.
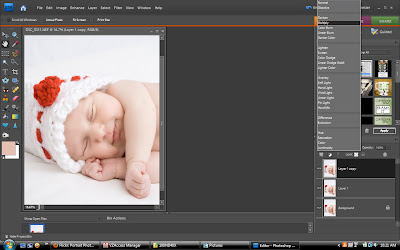
Adjust the opacity down, where it is a little dark but not too much.
With the middle layer set the blending mode to screen, this will brighten the image.
Adjust the opacity down so that the skin is nice and creamy and you still have good details.
Flatten the image
Duplicate the image
Run a high pass filter on the top layer.

Set the top layer to soft light, this keeps your details sharp.
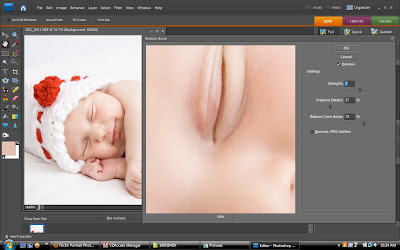
Finally you want to run a reduce noise filter on the bottom layer.
Again the numbers are not concrete, it is completely adjustable to your taste.
Then you flatten and you are done!
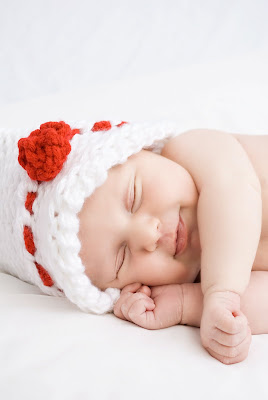
Final image :) Isn't she adorable!?
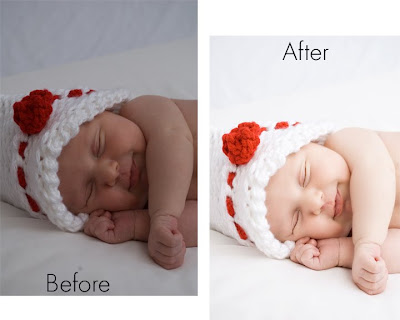
Lastly you can compare the image straight out of the camera with the final image.
First I will have to say that for newborn pictures it is all about the lighting, even lighting will give you a more even skin tone and you will have less editing to do. Also shooting in RAW is a must! At this session this adorable little girl gave a smile, just 1 smile.....and my strobe, camera left didn't fire so the lighting is not at all what I wanted.
This image is straight out of my camera in RAW format.

When I open up the RAW image in PSE I bring up my exposure and fill light until it is brighter and more evenly lit.

Of course next I run CoffeeShop baby powder room :) It is fantastic!
I don't use the red skin layer, so I start with the soft skin layer (I changed the blend mode so you can see where I brushed) I avoid the detail areas.

Then I use the gaussian blur at a pretty high amount so that it is nice and even.

The result from the soft skin layer after adjusting the opacity.

Next the lighten skin layer, you can see the areas I brushed over, avoiding the detail spots again.

Gaussian blur just as with the soft skin layer, and bring down the opacity.

Result after adjusting the opacity.

Next is the skin glow layer, I cover every inch of skin (changed blend mode to show where I brushed). Gaussian blur just like the previous 2 layers.

Result from skin glow after adjusting opacity

Then we have the eye define layer, I brush over the eyes and little detail areas I want to showcase.

Gaussian blur less this time, just enough to spread out the brush line to a more natural look.

Flatten the image
Now to remove the red tint from the skin. Add an adjustment layer and select hue/saturation.

Once you come to the adjustment layer menu, use your drop down menu to select reds. Use your dropper and select a red area of the newborns skin.

You want to increase the hue, which will turn the skin more yellow. Decrease the saturation thus decreasing the amount of yellow. Lighten a little bit too so that it makes the skin more creamy. These numbers are not the same for other photos, adjust them as much as you need to get the desired look.

Next duplicate the layer 2 times.
With the top layer set the blending mode to multiply, this will add more contrast to your image.

Adjust the opacity down, where it is a little dark but not too much.

With the middle layer set the blending mode to screen, this will brighten the image.

Adjust the opacity down so that the skin is nice and creamy and you still have good details.

Flatten the image
Duplicate the image
Run a high pass filter on the top layer.

Set the top layer to soft light, this keeps your details sharp.

Finally you want to run a reduce noise filter on the bottom layer.

Again the numbers are not concrete, it is completely adjustable to your taste.

Then you flatten and you are done!
Final image :) Isn't she adorable!?

Lastly you can compare the image straight out of the camera with the final image.


Nice tutorial. The skin colors always have me a bit baffled, but this really made it seem easy. I appreciate the time you took to write this all down.
ReplyDeleteThank you so much for taking the time to help out us amateurs & making your tutorials! I have learned a lot from your blog.
ReplyDeleteYes, thank you so very much. I love written tutorials and you do such an amazing job.
ReplyDeleteThank you so much for this tutorial, I have referenced it so many times over the past few months! I look forward to your future tutorials!
ReplyDeleteOkay...I'm confused
ReplyDeleteCould you email me on what brush you used..I think I'm doing something wrong in the beg.
I'm confused could someone help me! LOL
ReplyDeleteI used a soft white brush...under my basic brushes. It is fuzzy :)
ReplyDeleteWow - great tutorial! Thank you so much. so often I have seen over photo shopped babies so you can't see their little details etc but this has really helped me. thanks a bunch! :)
ReplyDeleteThanks so much! I just posted a Before and After picture which I just finished editing on my blog. I followed all the steps you outlined above in my editing and I shared your link in my post! Keep the tutorials coming!!!! :)
ReplyDeleteLove this tutorial. I have a batch of photos of my new Granddaughter and now I know how to fix them.. Thank You very much.
ReplyDeleteThis was done in PSE7
ReplyDeleteI currently use CS5
Thank you so much! This is great to see the whole process. I was wondering what macro add-ons you use for newborn photography. I love your tutorials!
ReplyDeleteThanks Morgan! This helped a lot! :)
ReplyDeleteHow do you set fill light in cs3 or 5??
ReplyDeleteWhat's a high pass filter?
ReplyDeleteCan I just say THANK YOU THANK YOU THANK YOU!! And that is still not enough! You have saved me from the many headaches and buckets of tears I've spent trying to figure this out! Seriously. I just want to fly to you give you such a great big hug and fly right back to my precious family. I have spent literally hours away from my little ones all bc I had a goal, an inspiration, a dream...and this was it. The bright white photos I have been dying to learn to do, and couldn't figure out for the life of me. So thank you, sooooooooo much. Ok, gotta go hug my babies and thank the Lord for you!
ReplyDeleteAlexandra
Pardon the ignorance but what is "CoffeeShop baby powder room"? and where can I find it?
ReplyDeleteWhat a beautiful quilt!
ReplyDeleteVery interesting article! I would like to add that using such websites should be present in every professional photographers’ working plan. But don’t forget about the key point of success – an amazing and qualitative photograph. To make it you should not only catch a good angle and create a composition, pay attention to the photo editing work. I shoot portraits and natural skin retouching is a must-have step for me. I’m not good at it, that’s why I’ve found a group on FB where guys from fixthephoto.com offered image post-production services. They are good and pro photo retouchers and I’m fully satisfied with all results.
ReplyDelete